

Follow us on Instagram for more fun ideas for kids!
Scroll all the way down to watch the video below to see this fun Cardboard Circle Weaving in action. Make sure to subscribe to our YouTube channel for more fun videos!
Have you tried weaving with the kids? We made this cool weaving loom from a log once which was a big hit and wanted to try our hand at circle cardboard weaving.
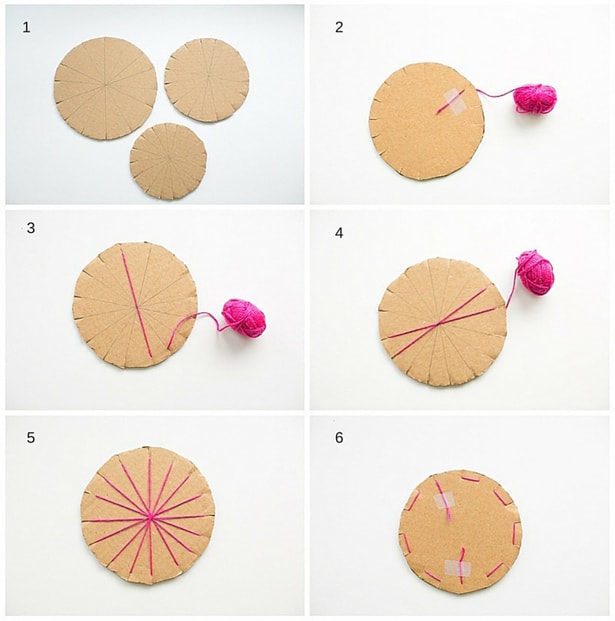
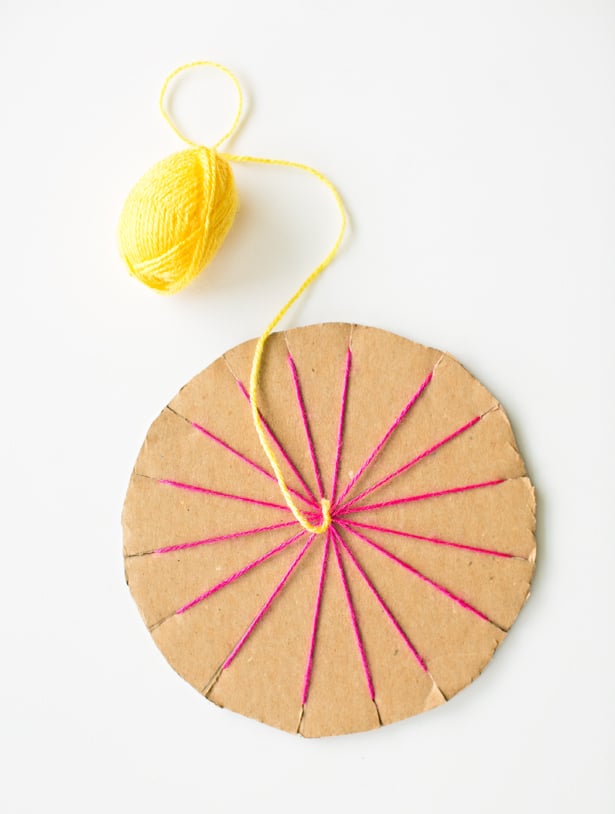
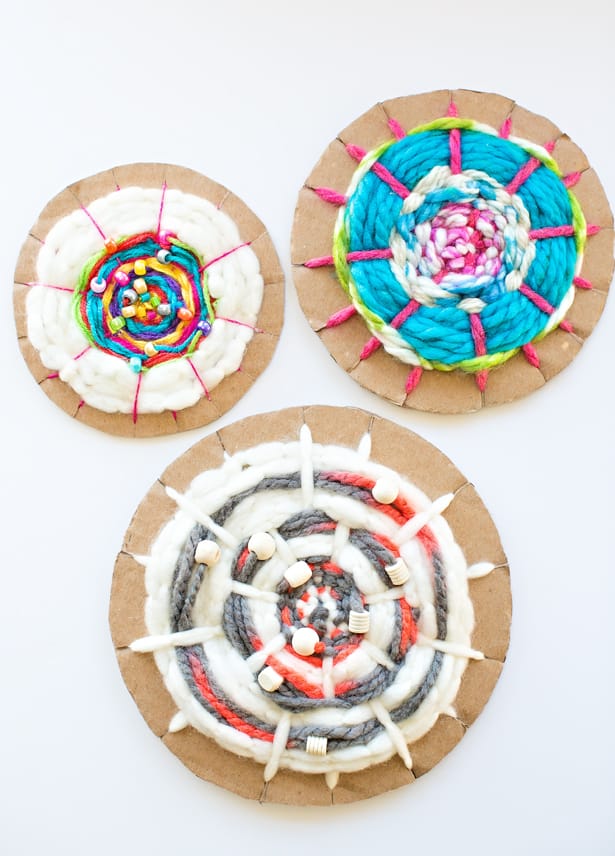
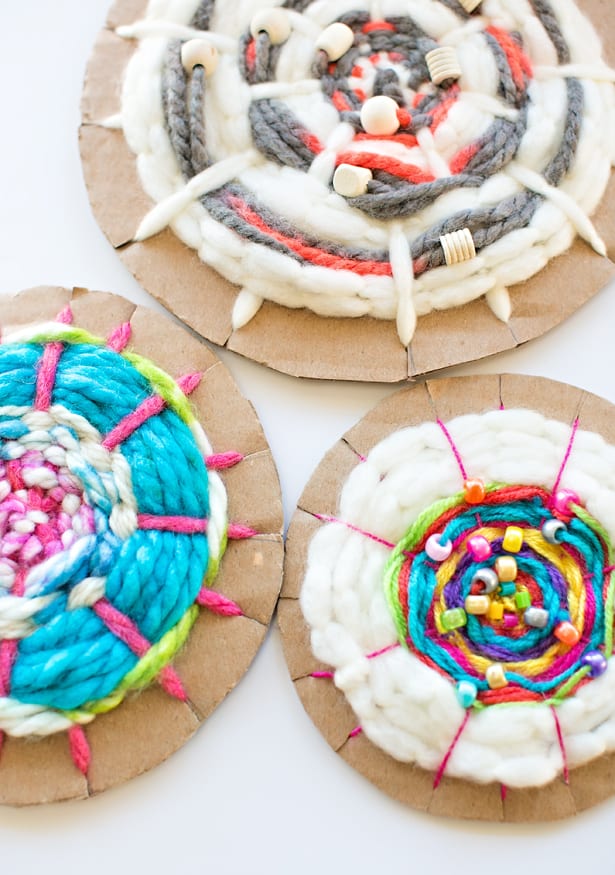
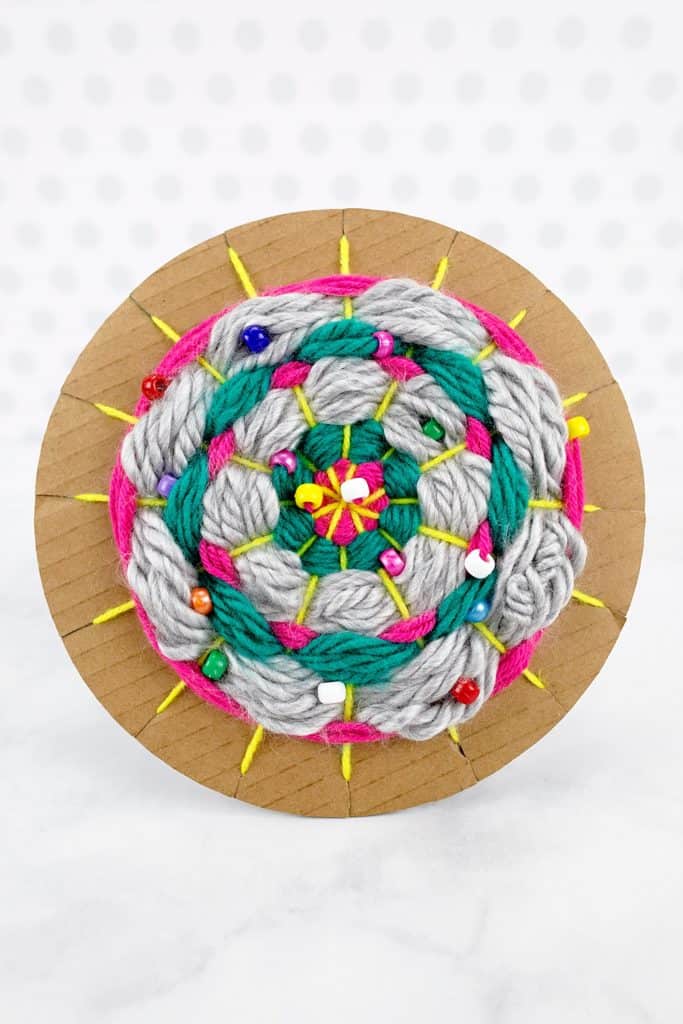
The one thing we found is that circle weaving is different from loom weaving in that you need an odd number of “spokes.” We started off with an even number shown below which means you can see some of the beginning strings in your finished weave.
They still look beautiful and the kids were very proud of their work so we’re sharing the how-to here. Just note if you want to do circle weaving the formal way, start off with an odd number of spokes.
Easy Cardboard Circle Weaving – Materials:
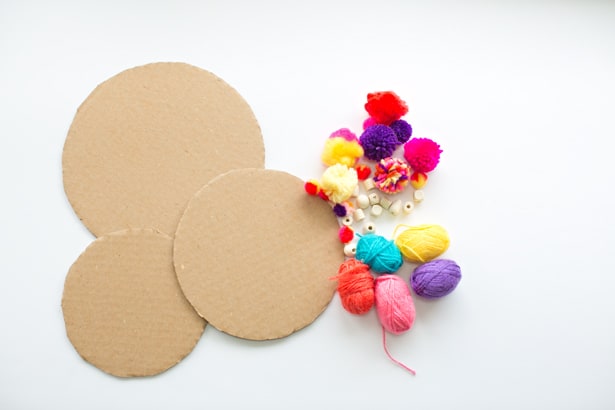
– Various colored yarns in different textures (we used both thin and chunky yarn)
– Cardboard
– Pencil
– Scissors
– Tape
– Assorted colorful and wooden beads
Instructions:
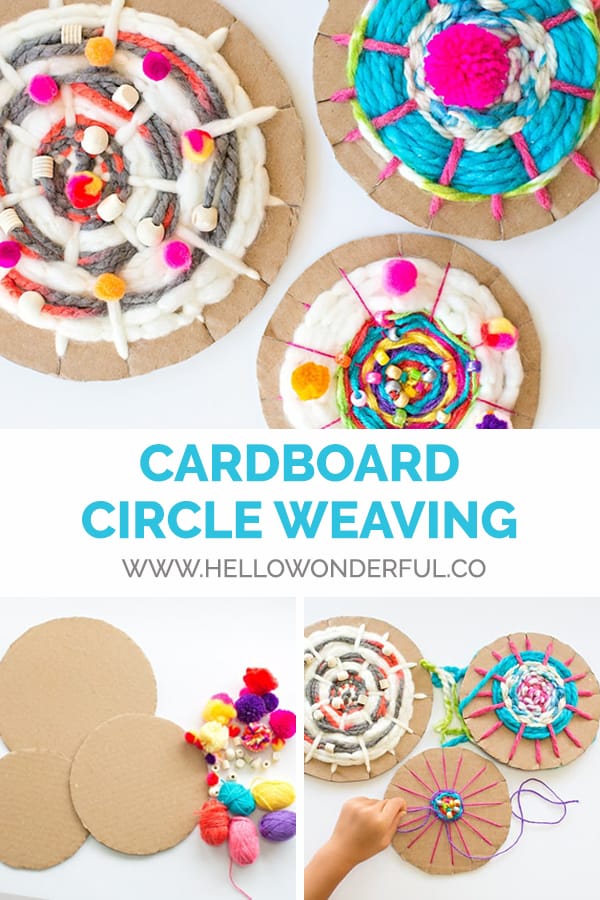
Step 1. Find various circle objects in your home and trace them out on cardboard. Cut out the circles.
Step 2. Follow the steps below to get your circle weave started.
1) draw spokes on your wheel with a pencil and add a cut notch. You can be exact and use a ruler if you want. As noted above, we gave our wheel an even number of spokes so you can see some of our beginning yarn peek out in the final weave, but if you don’t like that look, start with an odd number. 2) Tape a piece of yarn to the back of your circle. 3) Run it across and then to the adjacent cut. 4) and 5) Repeat until you have strings that follow your pencil lines. 6) Tape your ending yarn to the back.
Step 3. Tie the yarn you want to start weaving with through the center.
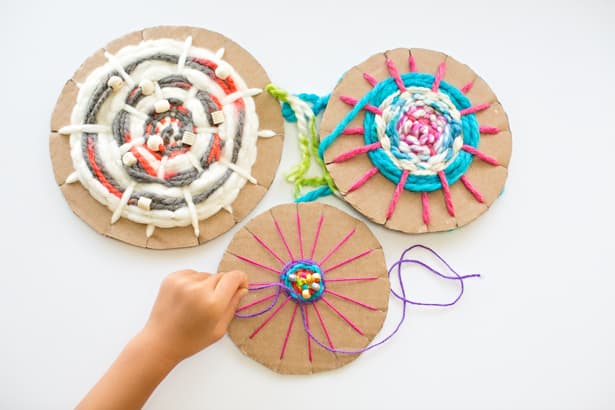
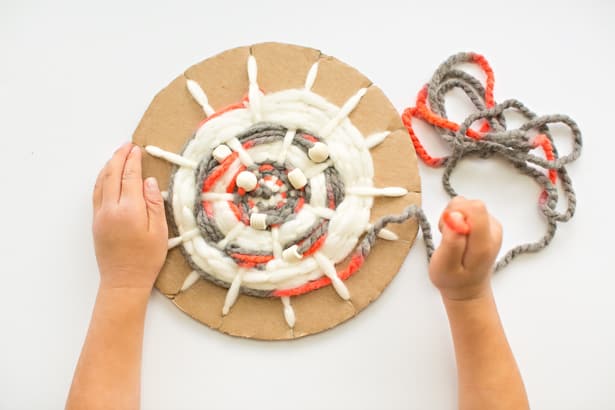
Step 4. Go around the circle over and under as shown below.
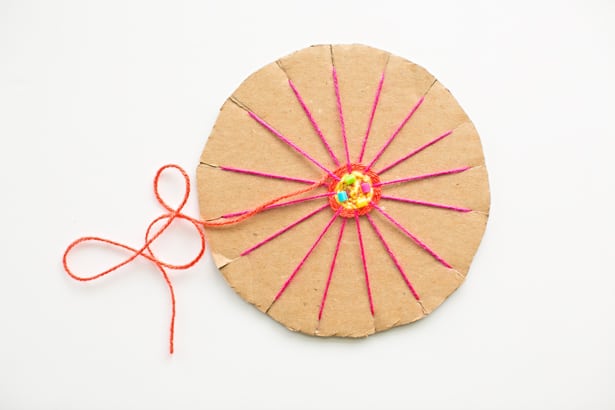
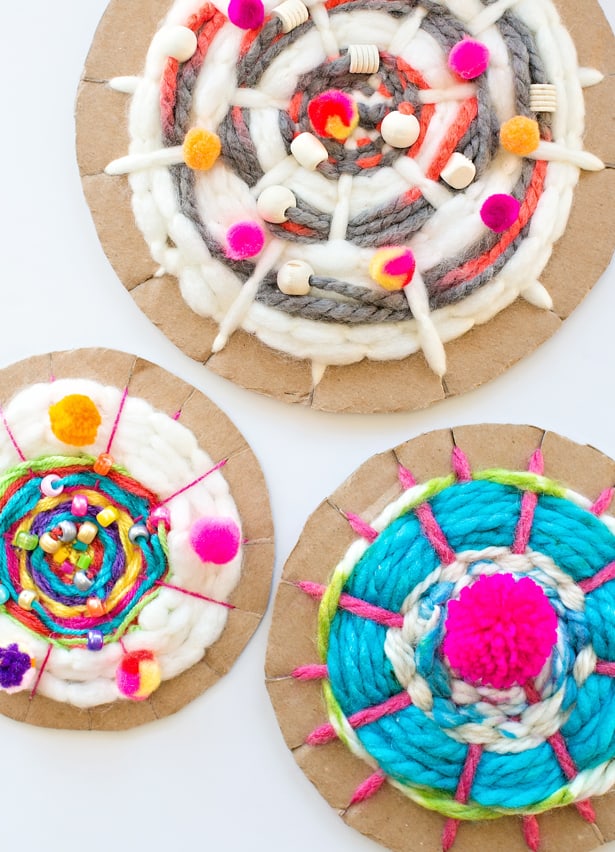
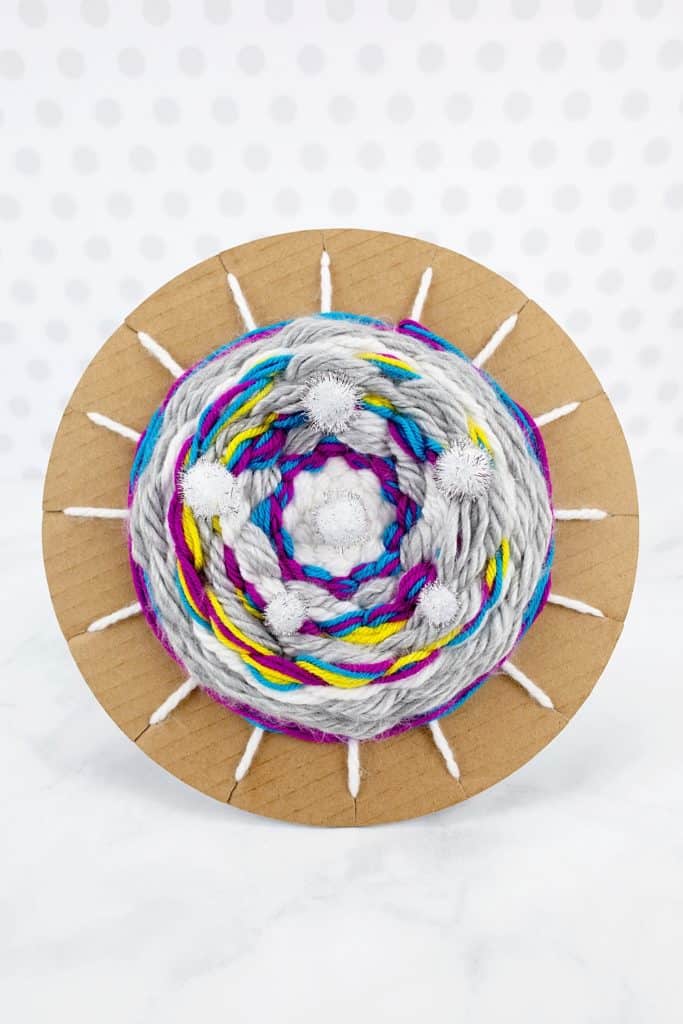
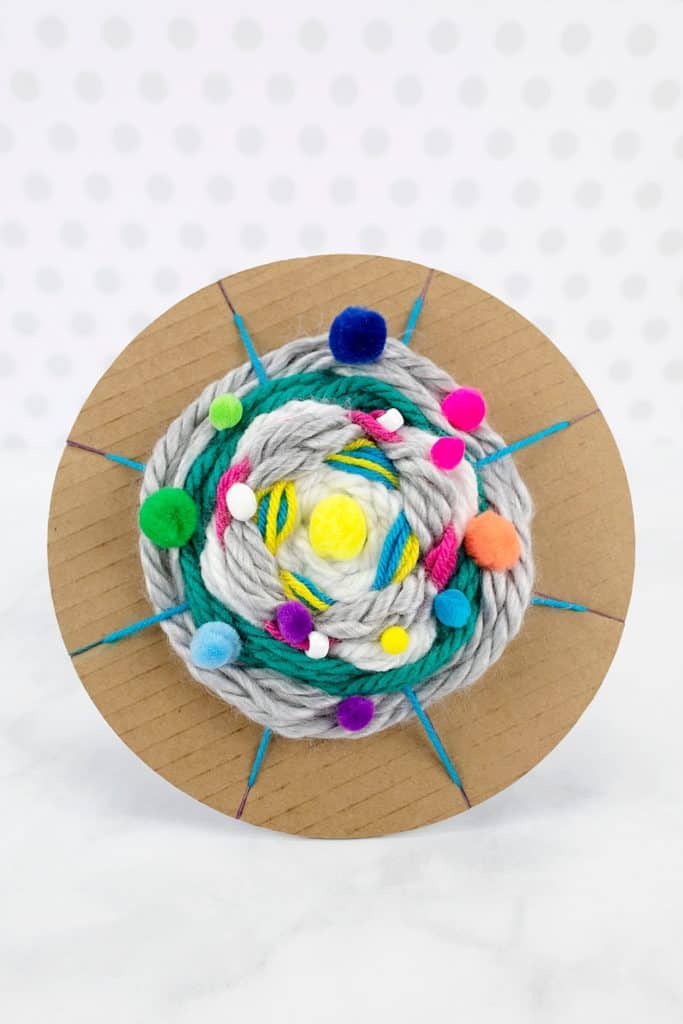
Step 5. Add beads along the way. Add new color yarn by simply tying it to the one on the loom.
Step 6. When you’re done, tape the yarn to the back of your circle.
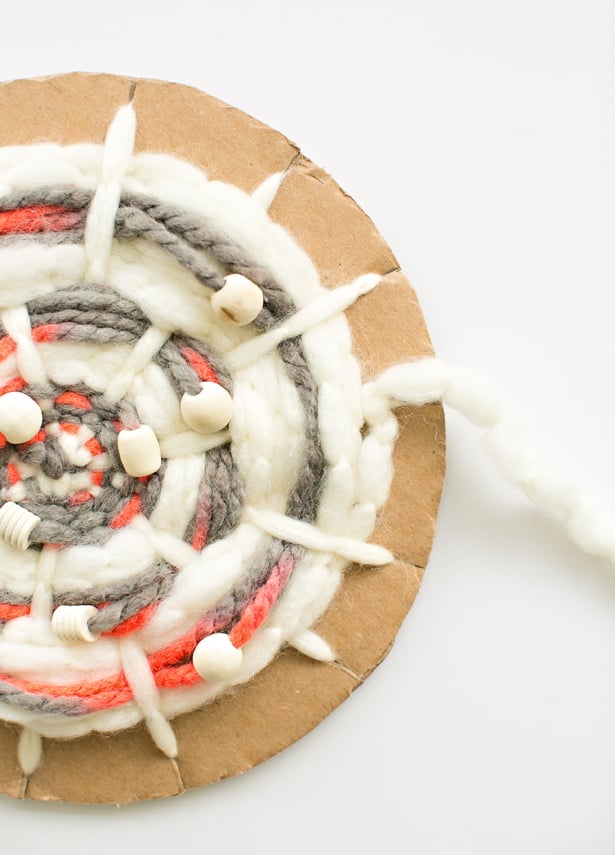
This is an easy kid-friendly way to circle weave that’s also enjoyable for adults to do side by side with kids. The chunkier yarn is easier for little hands.
There are more precise ways to create a circle loom (with instructions on tying off, etc. which you may want to search for) but this method worked for us as an easy and quick way to weave with the kids.
I love how this project requires simple materials you probably have on hand. And it’s a great way to recycle cardboard!
You can opt to glue on pom pom’s like we did to make this an even cuter wall hanging.

What are your favorite ways to weave with the kids? Check out more weaving projects here!
Check out our updated video (Dec 2018) to watch this Cardboard Circle Weaving craft in action right below:
Create cool kid-made woven art with easy cardboard looms and yarn. Step 1. Find various circle objects in your home and trace them out on cardboard. Cut out the circles. Step 2. Follow the steps below to get your circle weave started. 1) draw spokes on your wheel with a pencil and add a cut notch. You can be exact and use a ruler if you want. As noted above, we gave our wheel an even number of spokes so you can see some of our beginning yarn peek out in the final weave, but if you don’t like that look, start with an odd number. 2) Tape a piece of yarn to the back of your circle. 3) Run it across and then to the adjacent cut. 4) and 5) Repeat until you have strings that follow your pencil lines. 6) Tape your ending yarn to the back. Step 3. Tie the yarn you want to start weaving with through the center. Step 4. Go around the circle over and under as shown below. Step 5. Add beads along the way. Add new color yarn by simply tying it to the one on the loom. Step 6. When you’re done, tape the yarn to the back of your circle.EASY CARDBOARD CIRCLE WEAVING FOR KIDS


Materials
Instructions
Disclosure: Some of the links in the post above are “affiliate links.” This means if you click on the link and purchase the item, we will receive a small affiliate commission. Regardless, we give our promise that we only recommend products or services we would use personally and believe will add values to our readers.


Agnes Hsu is a mom of three and has been inspiring parents and kids to get creative with easy activities and family friendly recipes for over 10 years. She shares her love for creative play and kids food to her 2MM+ followers online. Agnes' commitment to playful learning and kindness has not only raised funds for charity but also earned features in prestigious nationwide publications.